 Skip to main content
Let's have a little recap and go over what we've done so far in the past two blogs. In the introduction: we look at our shitty code and learn about what we're going to do and how we're going to do it. We learn about how code is executed and where data is stored. In part 1: we successfully gained a root shell by inserting our own shellcode into memory and jumping to it via input to the program that we control. This time we'll turn on the first real mitigation against this kind of buffer overflow attack: the NX bit.
I've cloned the binary from part 1, saved it as "part2" in a new folder and made one small change, namely setting the NX bit by using the following code:

So, we can't put our shellcode in memory and jump to it because the CPU will notice and stop execution. Which means we need to think of a way around it. What about using pieces of code that are already there? They're already in bits of executable memory otherwise they wouldn't run. And if we control the return address of a vulnerable function we could jump to these pieces of code. Enter Return Orientated Programming.
We're going to use a method called "Return to libc" - using the internal c library functions present in memory to do what we need. In this instance we'll use a syscall to set our uid to 0, but we'll run the shell with a proper function like system(), just to demo both methods. We'll use the control that we have over the return address to redirect the flow to those code fragments - known as gadgets. First we'll need to look at how ROP actually works.
So, we'll try and keep this really simple. When a function returns one of the things it does is to remove all of the stuff it stored on the stack and shrink the stack back up towards higher memory addresses. After it does that the CPU reads the return address, performs the jump, and the next piece of code continues. When that returns the stack gets cleared some more.
Using this logic one can assume that we can chain together sufficient commands to perform the actions that we want as long as they end with a return command. And we can set up areas of the stack to be read by each gadget, perhaps to supply arguments to functions or syscalls. None of it needs to be executable, just readable, so the NX bit doesn't matter. And since we don't have to deal with ASLR we know those gadgets will be in the same place on every execution.
We'll do the easy one first and find the address of system(). Load the binary into gdb, set a breakpoint at *vuln+73, and run it with a real string in there. Then we can use the p command to print the "system" variable which contains the memory address of the system() function. This is pulled from something called the symbol table, but we're rapidly approaching the end of my debugging and coding knowledge here.

We can also use the find command to look for the string "/bin/sh" so that we can pass it as a parameter to system() - luckily there are a few places to find it in memory. Useful! Let's use the first one. It's from the binary. Heh.

Finally, as we saw in part 1 when we looked at the function calling conventions for x64 architecure, because we need to pass the string as the first parameter to system() we need to find a gadget somewhere to pop a pointer to its memory location into the %rdi register, followed by a return. We're using the peda command ropsearch for this, along with a syntax that is pretty self-evident.
As well as the system() call we'll also use a syscall to set the uid to 0 as in the last exploit. Here's the assembly of the shellcode we ran in the last part:
Luckily we don't really need to do this. We're using code already there, remember. So instead of setting %al to 0x69 we can find a code fragment to set %rax. I couldn't find anything in the binary, so instead I'll look for one in libc. The 0x69, as you can see from the syscall table we saw in part 1, is the required parameter for a setuid() syscall. We can put 0x69 into our user input, followed by the return address of the fragment. Let's find a "pop rax" to do that

We also need to find the address of a syscall too:

Finally we need to pass our chosen userid of 0 to the syscall via %rdi, so we can reuse the "pop rdi" we found earlier.
It's time to put something together in pwntools. You'll see here that it becomes much easier to keep track of your code if you set variables depicting what things you want to do or use to the values you require. Better than remembering all of those numbers. We're going to redirect this to a file again so we can step through it in gdb and look at what is going on.

If we open gdb and run the binary with our input file, we can see the journey that the instruction pointer and stack pointer take around in memory and also see the registers get populated with our chosen values. We'll run it with our breakpoint still at *vuln+73 so we can watch the jumps from that point. Let's hit the breakpoint and see what's happening.

As we can see we're sat at the return instruction. The %rsp register is pointing to our first ROP gadget already (look at the stack section in order - all of our commands and parameters are there!). So as soon as we continue the execution the first gadget's address will be POPed into %rip and consumed off the stack - and our magical mystery tour around memory begins. Use the 's' command to step forward an instruction:

We've jumped to our first gadget and the stack pointer has moved forwards in memory (which is backwards really, remember) to our parameter to move into the register. Now the POP will run and read our value off the stack and move the pointer onwards again to our next gadget ready for the following return instruction. Stepping forward with 's' again and checking %rax...:

Awesome. Next up is POPing 0 into %rdi. Then after that the jump to the syscall instruction, the stack pointer moving each time to the next piece of data to be read. We can see that basically anything goes! As long as we can reliably (fuck you ASLR) jump to where we need to we could conceivably write any code we like! Enter the 'c' command to continue and we'll see the exploit run:
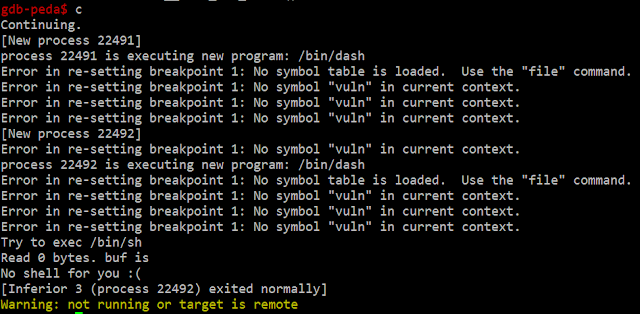
You'll see it's doing quite a lot here, with a few errors and odd things being displayed as a result. But we can see the shell commands definitely running. Obviously we can't interact with our shell again as in part 1, so we'll need to change the script so that we can use interactive mode. This is the result:

You'll notice that unlike in part 2 this time our exploit works both inside and outside gdb without modification. This is because our return addresses are pointing to locations that won't change when the executable is run outside of gdb. Those gadgets will always be in those memory addresses - on my system at least. ASLR is off. The only thing to that changes is the alignment of the start of the buffer, and you only care about that if you have something in there you want to jump to. If you don't you can quit worrying about it.
In many ways this makes ROP less fiddly than jumping to your own code. And it's a bit cooler and way more elegant to do, as well as beating the NX bit. And from using ROP we can open up other avenues for exploitation and maybe defeat other mitigations against our actions. Which is exactly what we'll do when we turn ASLR back on in part 3!
Link:Part 3
I've cloned the binary from part 1, saved it as "part2" in a new folder and made one small change, namely setting the NX bit by using the following code:
execstack -c ./part2Let's confirm that with checksec:

So, we can't put our shellcode in memory and jump to it because the CPU will notice and stop execution. Which means we need to think of a way around it. What about using pieces of code that are already there? They're already in bits of executable memory otherwise they wouldn't run. And if we control the return address of a vulnerable function we could jump to these pieces of code. Enter Return Orientated Programming.
We're going to use a method called "Return to libc" - using the internal c library functions present in memory to do what we need. In this instance we'll use a syscall to set our uid to 0, but we'll run the shell with a proper function like system(), just to demo both methods. We'll use the control that we have over the return address to redirect the flow to those code fragments - known as gadgets. First we'll need to look at how ROP actually works.
So, we'll try and keep this really simple. When a function returns one of the things it does is to remove all of the stuff it stored on the stack and shrink the stack back up towards higher memory addresses. After it does that the CPU reads the return address, performs the jump, and the next piece of code continues. When that returns the stack gets cleared some more.
Using this logic one can assume that we can chain together sufficient commands to perform the actions that we want as long as they end with a return command. And we can set up areas of the stack to be read by each gadget, perhaps to supply arguments to functions or syscalls. None of it needs to be executable, just readable, so the NX bit doesn't matter. And since we don't have to deal with ASLR we know those gadgets will be in the same place on every execution.
We'll do the easy one first and find the address of system(). Load the binary into gdb, set a breakpoint at *vuln+73, and run it with a real string in there. Then we can use the p command to print the "system" variable which contains the memory address of the system() function. This is pulled from something called the symbol table, but we're rapidly approaching the end of my debugging and coding knowledge here.
We can also use the find command to look for the string "/bin/sh" so that we can pass it as a parameter to system() - luckily there are a few places to find it in memory. Useful! Let's use the first one. It's from the binary. Heh.
Finally, as we saw in part 1 when we looked at the function calling conventions for x64 architecure, because we need to pass the string as the first parameter to system() we need to find a gadget somewhere to pop a pointer to its memory location into the %rdi register, followed by a return. We're using the peda command ropsearch for this, along with a syntax that is pretty self-evident.
As well as the system() call we'll also use a syscall to set the uid to 0 as in the last exploit. Here's the assembly of the shellcode we ran in the last part:
xorq %rdi,%rdi
mov $0x69,%al
syscall
Straight away you can see that something is being done to the first parameter %rdi and a hex value of 0x69 is being passed to... whatever %al is. That register basically points to the lower 8 bits of one of our 64 bit registers: %rax. You can store more data in the registers by splitting them up into smaller segments if your numbers are small enough. It can also help with a few other issues such as shellcode size and avoiding null bytes - both of which can hamper your efforts.
Luckily we don't really need to do this. We're using code already there, remember. So instead of setting %al to 0x69 we can find a code fragment to set %rax. I couldn't find anything in the binary, so instead I'll look for one in libc. The 0x69, as you can see from the syscall table we saw in part 1, is the required parameter for a setuid() syscall. We can put 0x69 into our user input, followed by the return address of the fragment. Let's find a "pop rax" to do that
We also need to find the address of a syscall too:

Finally we need to pass our chosen userid of 0 to the syscall via %rdi, so we can reuse the "pop rdi" we found earlier.
It's time to put something together in pwntools. You'll see here that it becomes much easier to keep track of your code if you set variables depicting what things you want to do or use to the values you require. Better than remembering all of those numbers. We're going to redirect this to a file again so we can step through it in gdb and look at what is going on.

If we open gdb and run the binary with our input file, we can see the journey that the instruction pointer and stack pointer take around in memory and also see the registers get populated with our chosen values. We'll run it with our breakpoint still at *vuln+73 so we can watch the jumps from that point. Let's hit the breakpoint and see what's happening.

As we can see we're sat at the return instruction. The %rsp register is pointing to our first ROP gadget already (look at the stack section in order - all of our commands and parameters are there!). So as soon as we continue the execution the first gadget's address will be POPed into %rip and consumed off the stack - and our magical mystery tour around memory begins. Use the 's' command to step forward an instruction:

We've jumped to our first gadget and the stack pointer has moved forwards in memory (which is backwards really, remember) to our parameter to move into the register. Now the POP will run and read our value off the stack and move the pointer onwards again to our next gadget ready for the following return instruction. Stepping forward with 's' again and checking %rax...:
Awesome. Next up is POPing 0 into %rdi. Then after that the jump to the syscall instruction, the stack pointer moving each time to the next piece of data to be read. We can see that basically anything goes! As long as we can reliably (fuck you ASLR) jump to where we need to we could conceivably write any code we like! Enter the 'c' command to continue and we'll see the exploit run:
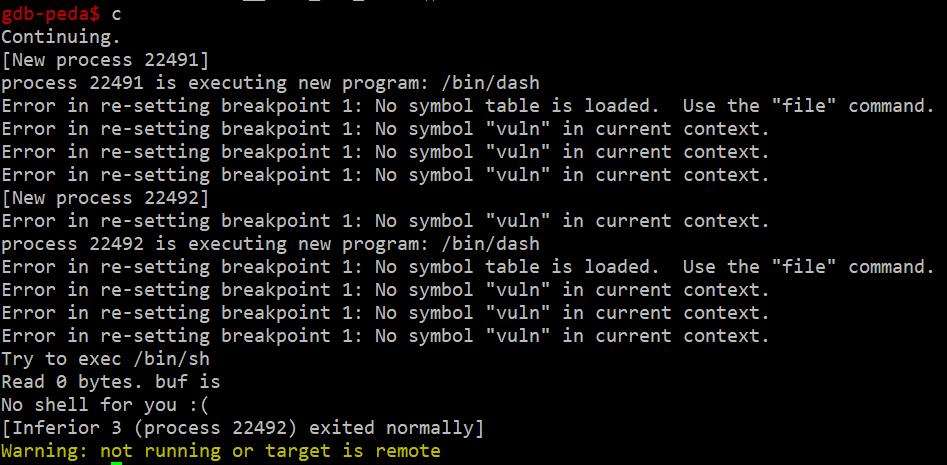
You'll see it's doing quite a lot here, with a few errors and odd things being displayed as a result. But we can see the shell commands definitely running. Obviously we can't interact with our shell again as in part 1, so we'll need to change the script so that we can use interactive mode. This is the result:

You'll notice that unlike in part 2 this time our exploit works both inside and outside gdb without modification. This is because our return addresses are pointing to locations that won't change when the executable is run outside of gdb. Those gadgets will always be in those memory addresses - on my system at least. ASLR is off. The only thing to that changes is the alignment of the start of the buffer, and you only care about that if you have something in there you want to jump to. If you don't you can quit worrying about it.
In many ways this makes ROP less fiddly than jumping to your own code. And it's a bit cooler and way more elegant to do, as well as beating the NX bit. And from using ROP we can open up other avenues for exploitation and maybe defeat other mitigations against our actions. Which is exactly what we'll do when we turn ASLR back on in part 3!
Link:Part 3
Comments
Post a Comment